

Fishing starts with a Coarse Net, not a rod. Craft the net, begin the Shrimp Catcher quest, and trawl small net fishing spots until Fishing level 3 unlocks rods. Rod fishing uses larger, separate nodes: cast into the spot, pull against the fish's direction, and reel only when the prompt appears. The main limitation is that nets and rods cannot be used interchangeably, while rod catches become much harder if you use the wrong technique, arrive with low stamina, or target later regions without progressing the skill.
The Short Route From Net to First Fish
Follow this sequence if you have not trained Fishing before:
- Craft a Coarse Net using 2 Coarse Thread at a Crafting Table.
- Speak to the Wise Old Man in Bramblemead to begin Shrimp Catcher.
- Find a small net fishing spot near the shore, equip the net, and trawl it for shrimp and other catches.
- Continue until you reach Fishing level 3 and unlock fishing rods.
- Craft an Ash Rod from 1 Ash Log and 1 Coarse Thread.
- Turn shrimp into Shrimp Bait if you want to improve your chance of catching the quest's sardine.
- Find a larger rod fishing spot, cast into it, tire the fish by pulling against its movement, and reel when it stops fighting.
- Return the sardine to the Wise Old Man to finish the introductory quest.
Shrimp Catcher teaches the complete early loop: net fish, turn a net catch into bait, craft a rod, and land a rod-only fish. It is also a useful way to learn the visual difference between the two node types before travelling farther from the starting region.
Start Fishing With a Coarse Net
Net fishing spots appear as small areas of disturbed or bubbling water close enough to enter. Equip a net, stand within the active spot, and use the Trawl action. Each trawl consumes 10 stamina and can produce a fish or junk such as stone or weeds. The first net catch is Raw Shrimp, which awards 8 Fishing XP and can be made into the preferred bait for sardines.
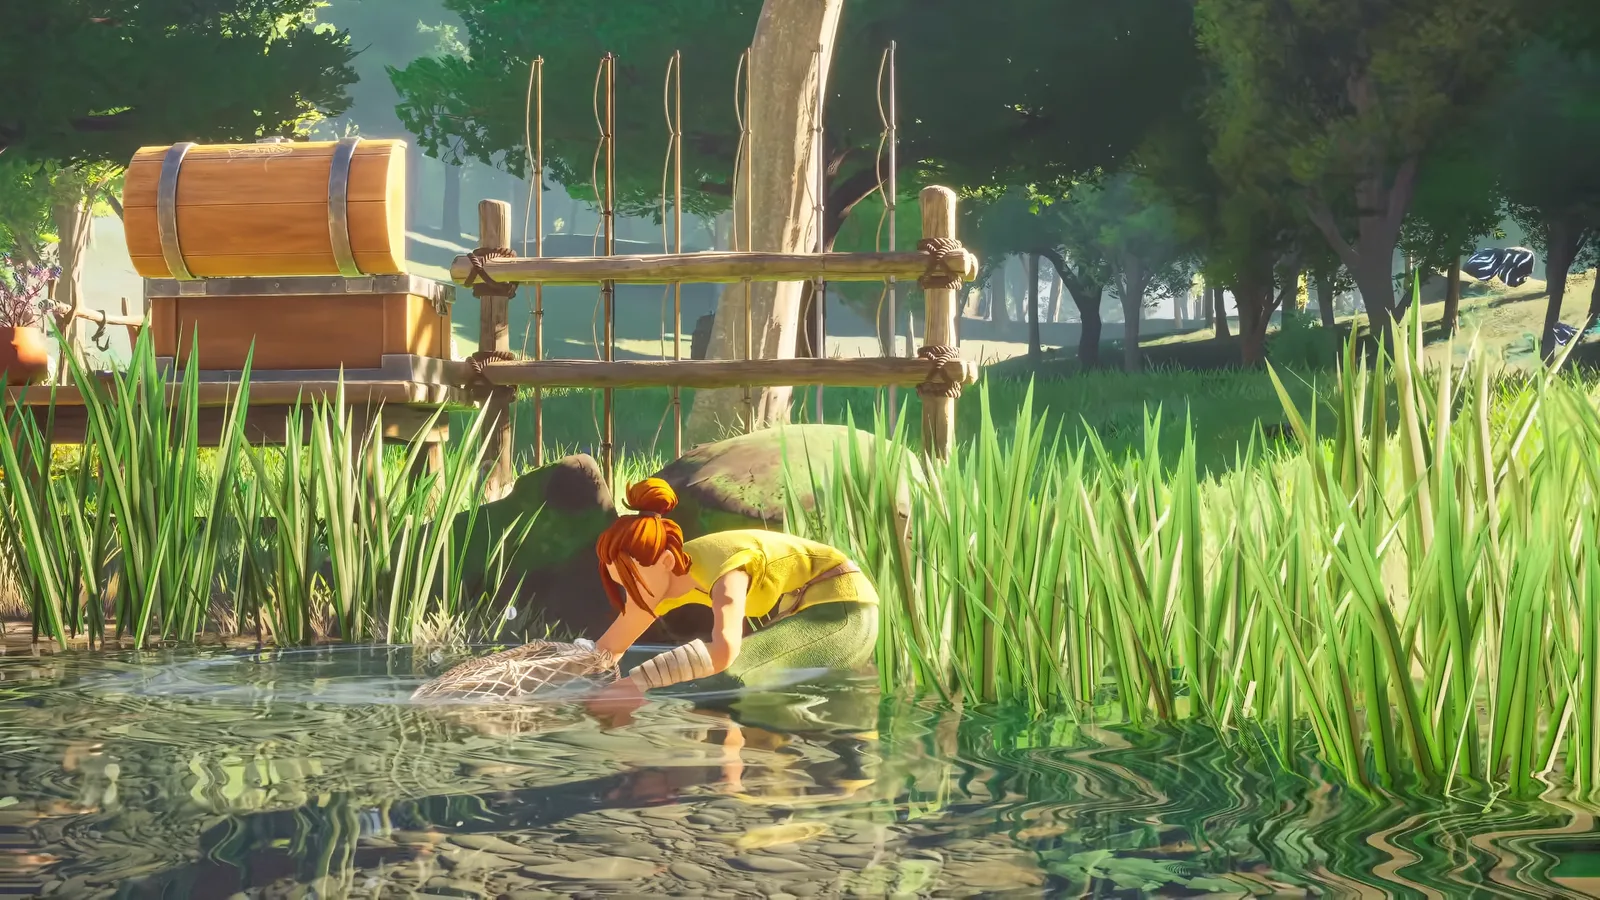
A net-only fishing example near the shore.
A net works only at a net fishing spot. It will not catch the fish assigned to the larger rod nodes, and changing to a better material does not turn it into a rod. Nets can, however, be used in any region regardless of their material. This makes net fishing a simple way to keep training, gather bait ingredients, and avoid the directional rod-fishing minigame.
A fishing spot eventually depletes. If the game reports that there are no fish there, move to another active spot rather than continuing to trawl the same water. Net catches follow the game's regional progression:
| Net catch | Power level | Base Fishing XP | Weight |
|---|---|---|---|
| Raw Shrimp | 2 | 8 | 0.2 |
| Raw Anchovies | 3 | 12 | 1.0 |
| Raw Lobster | 4 | 16 | 2.4 |
| Raw Giant Krill | 4 | 20 | 2.9 |
| Raw Monkfish | 7 | 35 | 2.5 |
These catches do not require bait. Several also feed directly into the rod-fishing loop: shrimp becomes the preferred bait for sardines, anchovies for herring, lobster for undead eel, giant krill for infernal eel, and monkfish for desert sole.
Unlock and Use a Fishing Rod
Fishing level 3 unlocks the ability to craft rods. The first is the Ash Rod, which is the region-matched choice for Brynmoor. Rod fishing spots are larger patches of active water with fish visible beneath the surface. Unlike a net spot, a rod spot must be approached from enough distance to cast into it.
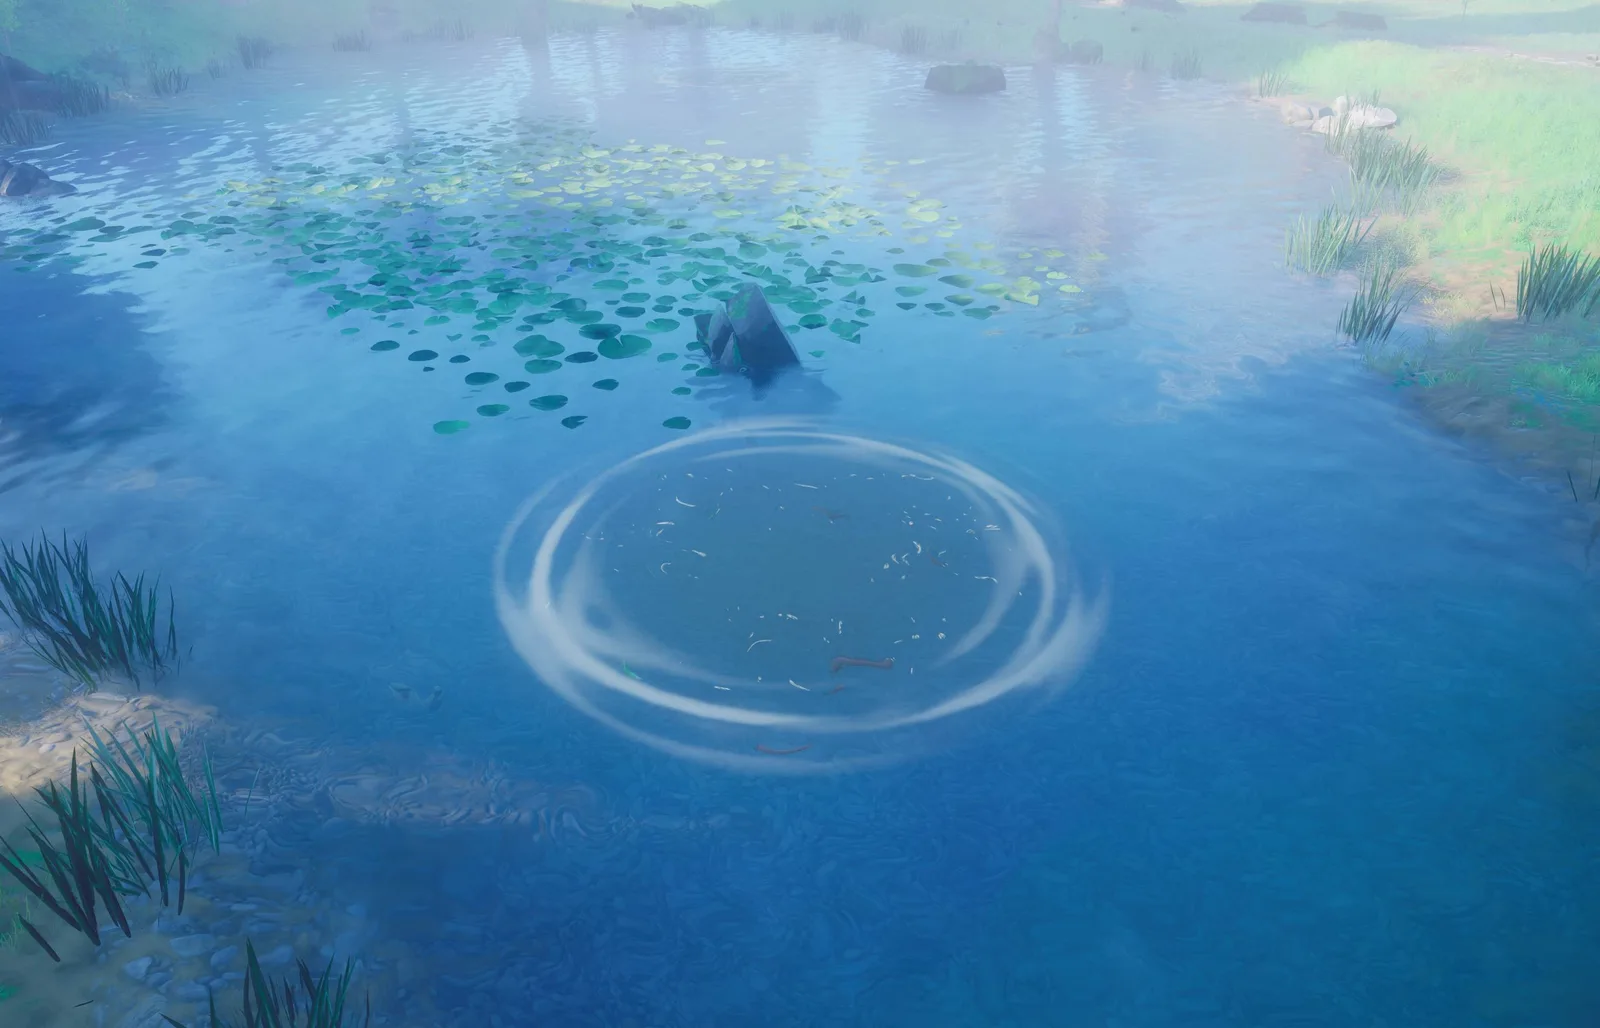
The larger active circle marks a rod fishing spot.
Equip the rod and, optionally, bait. On the default keyboard controls, hold the Cast action with the left mouse button to charge the throw. Releasing too early or too late can make the cast land short or pass beyond the node. A missed cast does not consume stamina or bait, so adjust the charge and try again.
After a successful cast, wait for a bite and watch both the fish bar and your own stamina:
- When the fish starts swimming, pull in the opposite direction. On the default keyboard controls, use A when the fish moves right and D when it moves left.
- Watch the fish bar. If it turns red, the fish has changed direction or you are pulling the wrong way. Switch sides immediately.
- Continue countering the fish until the reel prompt appears.
- Release the directional button and hold the Cast action to reel.
- If the fish resumes swimming, stop reeling and return to pulling against its direction.
- Repeat the counter-and-reel cycle until the fish's energy is depleted and the catch is landed.
Early catches may require several cycles. Fishing levels improve how quickly you drain fish stamina, so the same technique becomes more forgiving as the skill grows. Better regional rods also support progression into later waters, but they do not replace correct directional input.
Fix Escaped Fish and Failed Casts
Most failed catches come from one of four mistakes rather than bad luck.
The fish bar turns red
You are pulling in the wrong direction. Swap from A to D or from D to A. The fish can reverse during the fight, so the correct input can change more than once during a single catch.
Your stamina disappears while reeling
Do not reel continuously while the fish is actively swimming. Counter its movement first and wait for the reel prompt. Reeling is the fast way to reduce the fish's remaining energy, but only during the opening created after tiring it.
The cast never reaches the node
Rod spots require a suitable distance and casting strength. Hold the Cast action longer if the line falls short, or release sooner if it flies beyond the active water. A failed cast costs neither stamina nor bait.
You keep catching junk
Bait is optional, but fishing without it makes junk more likely. Equip the preferred bait for the target fish before casting. Bait improves the chance of that fish; it does not change a net node into a rod node or guarantee every cast will produce the desired catch.
The node no longer accepts fishing actions
The spot is depleted. Move to another visible fishing node. Logging out or repeatedly using the same empty water is not a substitute for finding an active spot.
You lose later-region fish before landing them
Return with a rod suited to that region, raise Fishing so you drain fish stamina faster, and begin with a full stamina bar. Do not attempt to compensate for low stamina by holding reel through the fish's movement; that makes the failure happen sooner.
Match Rods, Fish, and Bait by Region
Each region has a corresponding rod. The progression moves from Ash in Brynmoor to Yew in Umbral Sands. Bait is tied to the fish rather than the rod, so changing regions usually means checking both parts of the loadout.
| Region | Region-matched rod | Rod catch | Preferred bait | Base Fishing XP |
|---|---|---|---|---|
| Brynmoor | Ash Rod | Raw Sardine | Shrimp Bait | 20 |
| Brynmoor | Ash Rod | Raw Trout | Feather Bait | 25 |
| Ghornfell | Oak Rod | Raw Herring | Anchovy Bait | 30 |
| Ghornfell | Oak Rod | Raw Salmon | Feathered Lure | 35 |
| Fellhollow | Willow Rod | Raw Undead Eel | Lobster Bait | 45 |
| Fellhollow | Willow Rod | Raw Undead Bass | Spooky Bait | 45 |
| Dowdun Reach | Maple Rod | Raw Infernal Eel | Giant Krill Bait | 55 |
| Dowdun Reach | Maple Rod | Raw Armoured Catfish | Animated Feather | 60 |
| Umbral Sands | Yew Rod | Raw Desert Sole | Monkfish Bait | 65 |
| Umbral Sands | Yew Rod | Raw Beltfish | Kalphite Bait | 60 |
The bait column identifies the fish's preferred bait, not a mandatory admission cost. You can cast without bait, but the chance of junk rises. If you want one particular fish for food, bait, or a pristine trophy, bringing the matching bait makes the trip more focused.
Raw fish also have meaningful carry weight. Sardines weigh 1.5, trout 2.1, herring and salmon 1.8 each, undead eel 3.4, undead bass 3.0, infernal eel 3.1, armoured catfish 4.5, and the two listed Umbral Sands rod catches weigh 2.5 each. Clear inventory space before a long circuit instead of discovering halfway through that the heavier catches have consumed your remaining capacity.
Fishing Levels That Change the Routine
Fishing progression is not limited to new rods. Several levels introduce spells, storage, rare catches, or passive improvements that materially change how a fishing trip works.
| Fishing level | Unlock | Practical effect |
|---|---|---|
| 3 | Fishing Rod | Allows you to craft rods and use rod fishing spots. |
| 10 | Fishing Frenzy | Enchants a node so each successful catch supplies an additional fish of the same type while the effect lasts. It does not add Fishing XP for that extra fish. |
| 17 | Pristine Fish | Enables rare pristine catches. They yield more food when cooked or can be used as decorations. |
| 23 | Fish Weight Reduction | Reduces the carry weight of all fish by 25%. |
| 30 | Infernal Rod | Enchants the equipped rod for two minutes and instantly cooks fish caught during the effect. |
| 34 | Fishing Barrel | Unlocks high-capacity storage intended for fish. |
| 39 | Tackle Box | Unlocks a storage box for bait. |
| 43 | Troubled Waters | Adds a 15% reduction to fish maximum stamina while Fishing Frenzy is active. |
| 49 | Increased Net Fishing Catch Chance | Raises the net fishing catch chance to 75%. |
| 55 | Fishnado | Pulls up to five fish from a fishing node. |
| 60 | Greater Fishnado | Reduces Fishnado's cooldown. |
| 70 | Experienced Angler | Unlocks the Angler's Hat, which gives a 10% chance for a catch not to deplete the node. |
| 99 | Fishing Skillcape | Unlocks the Fishing skillcape and its trimmed variant. |
Use Infernal Rod only when cooked fish is the intended result. If you need raw fish for bait, another recipe, or storage, automatically cooking the catch works against that goal. Fishing Frenzy is useful when quantity matters, while Troubled Waters later makes the same enchanted node easier for rod fishing. Fishnado changes the pace again by extracting several fish without performing the normal rod fight for each one.
Pristine fish become available at level 17. They are separate rare versions of rod-caught fish and can be turned into display trophies. Pristine variants have a listed rarity of 1.5 in 100 at rod spots. Do not spend time pursuing them before the level 17 unlock is active.
Level Fishing Without Fighting the Controls
For straightforward training, rotate through net fishing spots and empty each active node. Trawling removes the casting and directional stages, so the time is spent on repeated catches rather than failed rod fights. Rod fishing remains necessary when you want its specific fish, pristine variants, or practice with the catch mechanic.
Several supported bonuses can improve a dedicated training session:
- An Inspiring Ring of Fishing adds 5% Fishing XP while worn.
- Knowledgeable Nourishment adds 10% XP while active.
- Focused Fishing potions provide either 15% or 30% Fishing XP bonuses, with durations determined by the potion tier.
- One piece of magic armour cuts the stamina regeneration delay by 50%, helping recovery between nodes.
- Leggings of Lightness add 50 carry weight, which is useful when keeping heavy raw fish.
- A Skills Necklace can produce bonus resources while gathering.
- At level 70, the Angler's Hat gives a 10% chance for a catch not to reduce the fish remaining in a node.
Choose equipment around the current problem. XP bonuses help training, carry weight helps long collection trips, and stamina recovery helps when moving between nodes or repeatedly using rods. No bonus fixes incorrect directional input, so learn the counter-then-reel rhythm before committing valuable bait to difficult fish.
Store Each Part of the Catching Loop
Fishing produces three categories worth separating at your base: raw fish, bait, and tools. The Fishing Barrel unlocked at level 34 is the high-capacity option for fish, while the Tackle Box unlocked at level 39 keeps bait organized. Until those unlocks are available, clear ordinary storage and inventory space before leaving on a route.
Keep enough low-tier net catches to make the bait needed for your next rod target instead of cooking the entire haul immediately. Likewise, decide before casting whether Infernal Rod's instant cooking is useful. A little planning prevents a successful fishing trip from leaving you with cooked food when you needed bait, raw ingredients, or a pristine display catch.
See map filters for fishing spots for the requirements and steps of that next task.