
To get the Staff of Light, begin the Wizard Statue quest at the Runecrafting Guild, enter the Dragonkin Vault northeast of the guild, and use Windstep to reach a hidden room above the area with giant rats. Speak to the glowing statue, return to the Wizard Statue with the password Pthentorok, then charge the orb you receive at three tower-top pedestals around the guild. Return the charged orb to unlock the recipe.
Unlocking the recipe is only the first requirement. Crafting one Staff of Light requires Artisan 100, a Mystic Forge, 16 Blightwood, 8 Wild Anima, 4 Sapphire, 12 Vault Shards, and 1 Vault Core. The staff is a Magic weapon with a comparatively high rune damage modifier and can be ascended through the available power levels at the Mystic Forge with ascension cores.
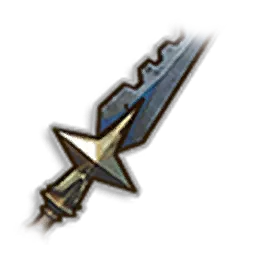
Staff of Light Requirements at a Glance
The full route has three distinct parts: discover the recipe, meet the crafting requirements, and ascend the finished weapon if you want a higher-power version. Completing one part does not automatically complete the others.
| Stage | Requirement | Result |
|---|---|---|
| Start the unlock route | Speak to the Wizard Statue at the Runecrafting Guild | Begins the recipe quest |
| Discover the password | Explore the Dragonkin Vault, use Windstep, and speak to the hidden glowing statue | Reveals Pthentorok |
| Obtain the orb | Return to the Wizard Statue with the password | Gives you the orb used at the towers |
| Charge the orb | Reach and activate all three tower pedestals around the guild | Completes the charging step |
| Finish the unlock | Bring the charged orb back to the Wizard Statue | Unlocks the Staff of Light recipe |
| Craft the weapon | Use the required materials at a Mystic Forge with Artisan 100 | Produces one Staff of Light |
| Improve the weapon | Use ascension cores at the Mystic Forge | Raises it toward the highest available power level |
Before attempting the route, make sure you can use Windstep. It is required both for the concealed path inside the vault and for reaching the pedestals on top of the towers. The supplied information does not provide a substitute route that avoids Windstep.
Unlock the Staff of Light Recipe
Start at the Runecrafting Guild
Go to the Runecrafting Guild and speak to the Wizard Statue. This interaction starts the Staff of Light recipe quest and establishes the statue as the place to which you must return during later stages.
Do not head directly to the towers and expect their pedestals to finish the unlock. The described sequence first sends you into the Dragonkin Vault to learn a password. The orb used at the pedestals is obtained only after you bring that password back to the Wizard Statue.
Enter the Dragonkin Vault Northeast of the Guild
From the guild, travel to the Dragonkin Vault northeast of the Runecrafting Guild. Continue through the vault until you reach the room containing giant rats.
The important feature in this room is not on the ordinary ground-level route. Look around the broken pillars for an elevated path. This is the easily missed part of the unlock: the route continues above the obvious floor rather than through a conventional doorway at ground level.
Find the Hidden Room in the Dragonkin Vault
Use Windstep near the broken pillars to reach the elevated path. Follow that upper route into the hidden room. Inside, find the glowing statue and speak to it.
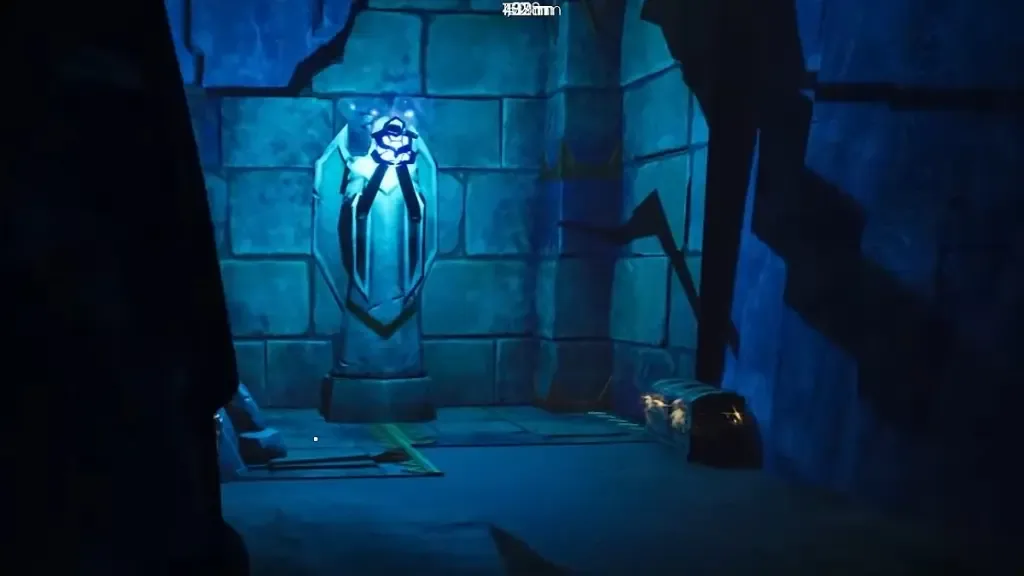
The hidden statue room reached through the elevated Windstep route.
The statue reveals the password:
Pthentorok
Keep the spelling exact when returning to the Wizard Statue. Reaching this room and learning the password is the discovery stage; it does not immediately add the Staff of Light recipe or produce the weapon.
Return the Password to the Wizard Statue
Leave the vault and return to the Wizard Statue at the Runecrafting Guild. Give it the password Pthentorok. The statue then gives you an orb that must be charged before the recipe can be unlocked.
At this point, your objective changes from exploring the vault to navigating the structures around the guild. If you reached the glowing statue but do not have the orb, return to the Wizard Statue before trying to visit the tower pedestals.
Charge the Orb at Three Tower Pedestals
There are three pedestals on top of towers around the Runecrafting Guild. Use Windstep to reach each tower and charge the orb at its pedestal.
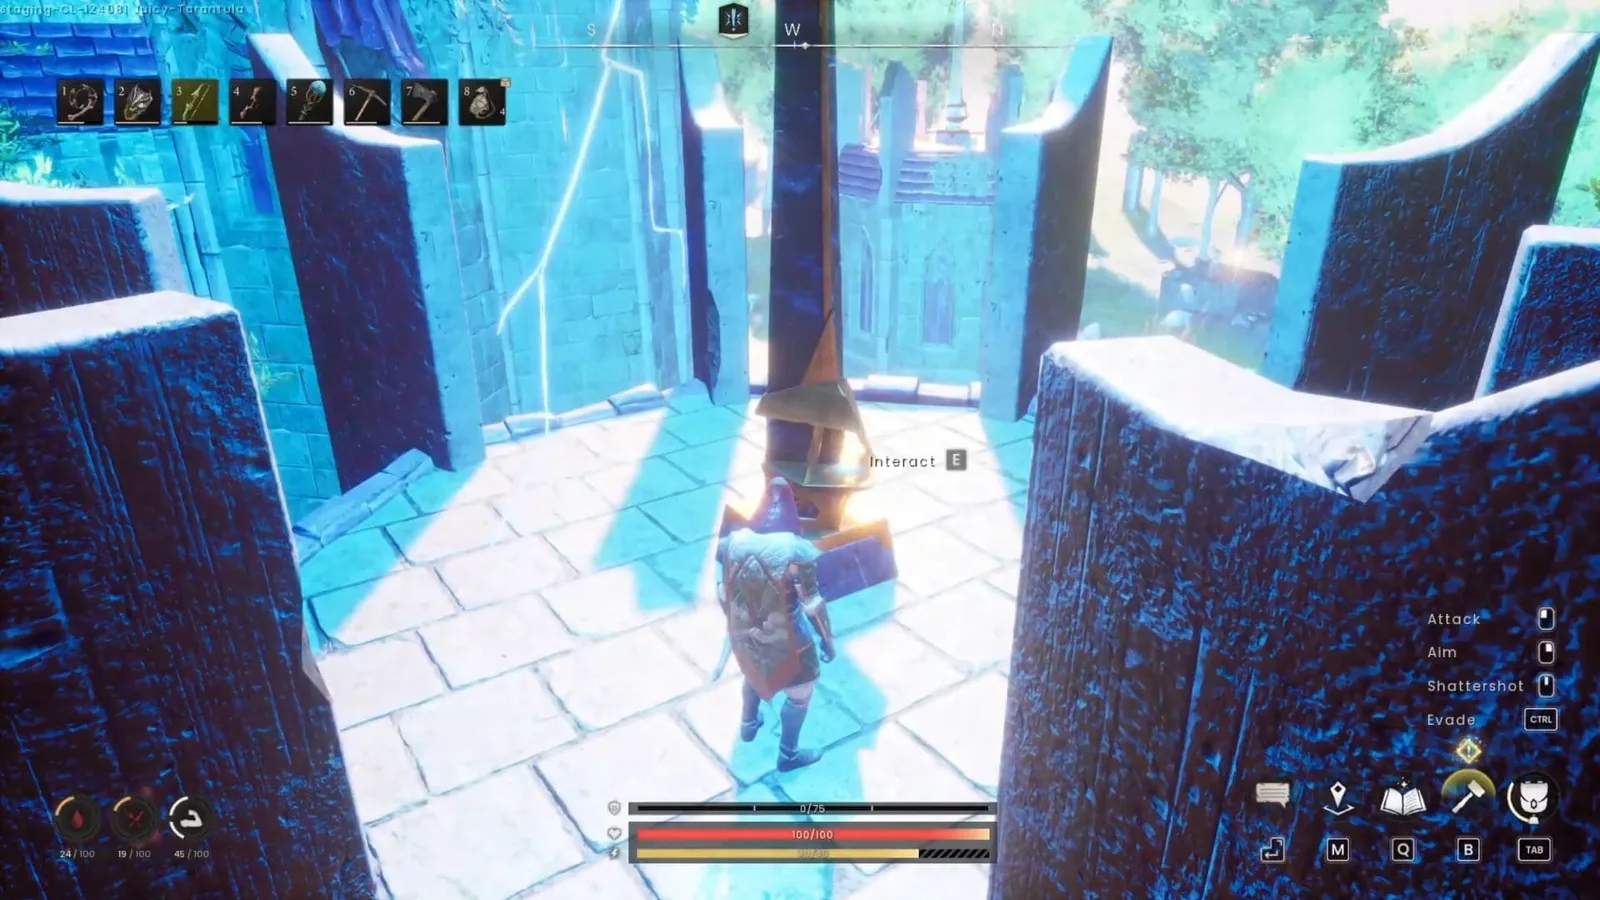
One of the tower-top pedestals used to charge the orb.
Treat all three activations as required parts of one objective. Visiting only one or two pedestals leaves the orb incomplete. The supplied research identifies the number of pedestals and their position on towers around the guild, but it does not establish a mandatory order. Avoid assuming that a particular tower must be first unless the game itself marks a sequence for you.
A simple completion check is:
- Start with the orb obtained from the Wizard Statue.
- Reach a tower-top pedestal with Windstep.
- Use the pedestal to charge the orb.
- Repeat the activation at each of the other two towers.
- Return to the Wizard Statue only after all three pedestals have been used.
Return the Charged Orb
Bring the charged orb back to the Wizard Statue. Completing this final hand-in unlocks the Staff of Light recipe.
Recipe access does not bypass the separate Artisan, facility, or material requirements. If the recipe is unlocked but the weapon remains unavailable to craft, check those requirements rather than repeating the vault route.
Craft the Staff of Light at the Mystic Forge
The Staff of Light is crafted at the Mystic Forge. Older information that directs you to a Smithing Anvil is outdated: the supplied changelog information states that the item moved to the Mystic Forge after the Smithing Anvil was removed from the game.
You need Artisan 100 and the following materials for one staff:
| Material | Quantity |
|---|---|
| Blightwood | 16 |
| Wild Anima | 8 |
| Sapphire | 4 |
| Vault Shard | 12 |
| Vault Core | 1 |
| Output: Staff of Light | 1 |
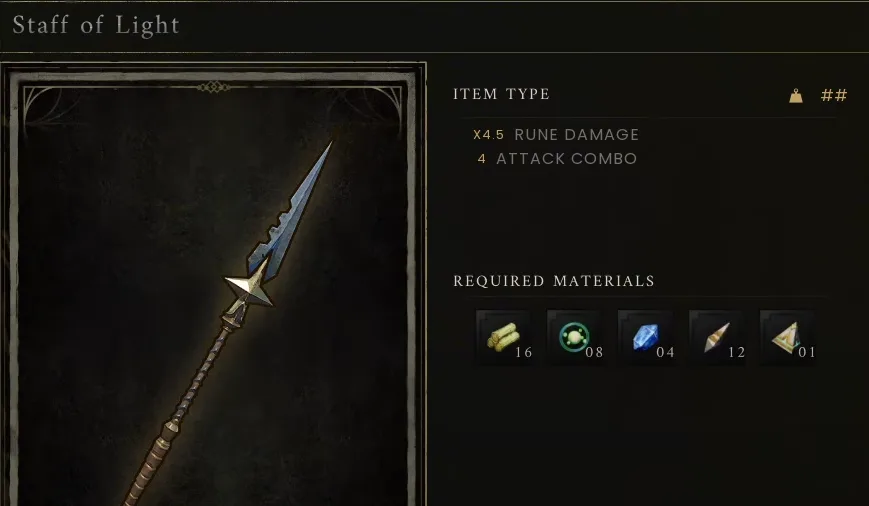
The recipe screen lists the Staff of Light materials and rune-damage stats.
Check the requirements as separate gates:
- Recipe gate: Complete the Wizard Statue, vault, password, orb, and pedestal sequence.
- Skill gate: Reach Artisan 100.
- Facility gate: Use a Mystic Forge.
- Material gate: Carry the exact quantities shown in the recipe.
This separation matters when diagnosing a failed crafting attempt. Finishing the quest reveals the recipe, but it does not grant the weapon or waive Artisan 100. Likewise, reaching Artisan 100 and owning the materials does not replace the recipe-unlock sequence.
The material list includes both Vault Shards and a Vault Core. They are distinct recipe entries, so twelve Vault Shards do not replace the single Vault Core. The supplied material data does not identify substitutions for any ingredient.
Staff of Light Stats by Power Level
The Staff of Light is a Magic weapon with the Staff attack style and a four-hit attack combo. Its listed durability remains 1,300 at every documented power level, while its rune damage modifier increases as the weapon ascends.
| Power level | Damage type | Attack style | Rune damage | Attack combo | Durability |
|---|---|---|---|---|---|
| 4 | Magic | Staff | 4.5 | 4 | 1,300 |
| 5 | Magic | Staff | 5.8 | 4 | 1,300 |
| 6 | Magic | Staff | 7.2 | 4 | 1,300 |
| 7 | Magic | Staff | 8.7 | 4 | 1,300 |
The staff weighs 15.0. That figure reflects the documented change from its earlier weight of 6.0, so older references showing the lower value should not be used for the current item.
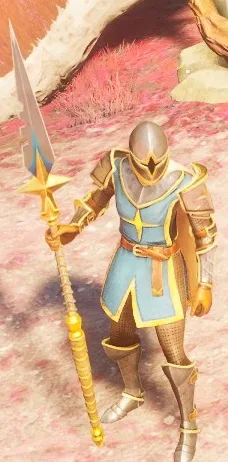
The equipped weapon has a distinctive gold-and-blue staff design.
The weapon's defining practical strength is its rune damage modifier. It is higher than that of most other staves at the same power level. That makes it a straightforward magic weapon for players who value strong rune damage without accepting the lower durability of its closest documented comparison.
Ascend the Staff at the Mystic Forge
The Staff of Light can be ascended to the highest available power level by using ascension cores at the Mystic Forge. The supplied material does not specify the number or type of ascension cores required at each step, so confirm the displayed cost in your current Mystic Forge interface before committing resources.
Ascending changes the rune damage value associated with the staff's power level. The documented progression is 4.5 at power level 4, 5.8 at level 5, 7.2 at level 6, and 8.7 at level 7. The attack combo remains four and durability remains 1,300 throughout the listed progression.
Keep the two Mystic Forge actions separate in your planning:
- Craft the Staff of Light with the recipe materials after reaching Artisan 100.
- Use ascension cores at the Mystic Forge to raise the finished staff through higher power levels.
Do not add ascension cores to the base recipe material list. They belong to the later upgrade process, and the research does not support folding them into the initial crafting cost.
Staff of Light Compared with the Necromancer's Staff
The closest documented comparison is the Necromancer's Staff. At the same power level, its rune damage modifier is only 0.1 higher than the Staff of Light's. At power level 7, the resulting difference is described as roughly 0 to 4 damage, depending on rune type, which hit of the combo lands, critical hits, and whether a magic focus is used.
That small numerical difference matters only when it changes an enemy breakpoint—when the extra damage reduces the number of hits required to defeat the target. It should not be treated as a guaranteed four-point advantage on every attack.
Durability creates the clearer contrast. The Staff of Light has 1,300 durability, while the Necromancer's Staff has 1,050, which is 20% lower. Magical Mending can make durability management less troublesome, but the larger reserve may still matter during extended content such as the 30 waves of the Fight Caves.
The practical choice supported by these facts is narrow:
- Choose the Staff of Light when you value 1,300 durability and rune damage that remains very close to the stronger documented modifier.
- Consider the Necromancer's Staff when its extra 0.1 modifier changes a useful damage breakpoint for your exact setup.
- Do not assume one staff always wins without accounting for rune type, combo hit, critical hits, magic focus use, and the target's remaining health.
This comparison is not a general ranking of every weapon. It only explains the specific tradeoff documented for the Staff of Light and its nearest cited alternative.
Common Reasons the Staff Is Still Unavailable
The Vault Route Appears to End in the Rat Room
The hidden continuation is elevated. Search near the broken pillars and use Windstep to reach the upper path. Following only the obvious floor route can cause you to miss the hidden room and glowing statue.
The Password Did Not Unlock the Recipe
The password is an intermediate step, not the final reward. Return Pthentorok to the Wizard Statue to receive the orb, charge that orb at all three tower pedestals, and then bring it back to the statue.
The Orb Is Not Ready to Return
Confirm that you activated three separate pedestals on the tower tops around the Runecrafting Guild. A partial circuit does not complete the described charging objective.
The Recipe Is Visible but Crafting Is Blocked
Verify all three crafting gates: Artisan 100, access to a Mystic Forge, and the complete material set. The required inventory is 16 Blightwood, 8 Wild Anima, 4 Sapphire, 12 Vault Shards, and 1 Vault Core.
An Older Guide Sends You to a Smithing Anvil
Use the Mystic Forge. The documented changelog states that the Staff of Light is now created there because the Smithing Anvil was removed from the game.
The Expected Defensive Effect Does Not Trigger
Do not plan around a 33% melee-resistance effect. An unused status effect for 33% melee resistance over six seconds exists in cached information, but it is not currently active in the game. The journal's defensive lore does not establish an active gameplay bonus.
The Displayed Weight Does Not Match an Old Reference
The current documented weight is 15.0. A value of 6.0 comes from an earlier version of the item and was changed.
Final Completion Checklist
Use this checklist to separate unlock progress from crafting and upgrading:
- Speak to the Wizard Statue at the Runecrafting Guild.
- Enter the Dragonkin Vault northeast of the guild.
- Reach the giant-rat room and locate the broken pillars.
- Use Windstep to follow the elevated path into the hidden room.
- Speak to the glowing statue and learn Pthentorok.
- Return the password to the Wizard Statue and receive the orb.
- Use Windstep to reach all three tower-top pedestals around the guild.
- Charge the orb at every pedestal.
- Return the charged orb to unlock the recipe.
- Reach Artisan 100 and use a Mystic Forge.
- Gather 16 Blightwood, 8 Wild Anima, 4 Sapphire, 12 Vault Shards, and 1 Vault Core.
- Craft one Staff of Light.
- Use ascension cores at the Mystic Forge if you want to raise its power level.
Following that sequence takes you from the initial Wizard Statue interaction to a crafted, upgradeable Staff of Light without confusing the recipe unlock, base crafting requirements, and ascension process.