

RuneScape Dragonwilds Vault Shards come from vault monsters and chests inside Dragonkin Vaults. Clear every guardian you can handle, search each accessible chest, and move to another vault if a cleared location has not repopulated. Drops are chance-based: even the named guardians do not award a shard every time, so rotate between active vaults instead of relying on a fixed reset schedule.
Vault Shards are not Vault Cores. Cores are normally collected from pillars near progression points, while shards are loot from enemies and chests. They are also unrelated to Ascension Shards, which belong to a separate equipment-upgrade system.
Vault Shard quick facts
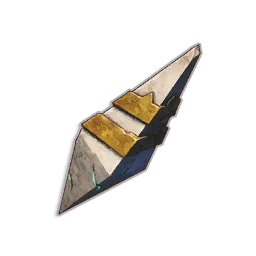
The Vault Shard inventory icon.
| Property | Value |
|---|---|
| Item type | Basic Item |
| Description | Stone imbued with remnants of dragonkin magic |
| Where it appears | Dragonkin Vaults |
| Primary sources | Vault monsters and vault chests |
| Weight | 5.0 |
| Stack limit | 99 |
| Main purpose | Crafting weapons, armour, jewellery, shields, stations, and decorations |
A stack occupies one inventory slot, but the weight still matters during a long clear. If shards are your main objective, leave unnecessary heavy materials at your base before entering a vault. This becomes more important when you also collect the much heavier Vault Cores during the same run.
Where to find Dragonkin Vaults
Dragonkin Vaults are dungeons distributed across Ashenfall. Their interiors contain traps, ordinary creatures, vault guardians, chests, recipes, and other regional resources. You must discover a vault before its location appears on your map.

The map marker used for a discovered Dragonkin Vault.
The known standard progression list provides several places to search. A higher power level does not automatically make a vault the best shard farm; enemy composition, clear time, and your current equipment all matter.
| Progression | Vault | Power level | Area |
|---|---|---|---|
| 1 | Crasorak Kara | 2 | Temple Woods |
| 2 | Thishepen Kara | 2 | Bramblemead Valley |
| 3 | Vertentis Kara | 2 | Whispering Swamp |
| 4 | Takla Kara | 3 | Fractured Plains |
| 5 | Skeklac Kara | 4 | Fractured Plains |
| 6 | Kletterbuja Kara | 3 | Bloodblight Swamp |
| 7 | Chaktan Kara | 4 | Stormtouched Highlands |
| 8 | Kalistrakthen Kara | 5 | Emberwood |
| 9 | Skekven Kara | 5 | Lake of Lost Souls, east |
| 10 | Vekchenven Kara | 5 | Lake of Lost Souls, west |
Start with a vault whose enemies you can defeat consistently. The first three listed vaults are all power level 2, so they provide the earliest supported options without forcing a trip into a higher-level region. Later vaults remain useful when normal progression has already taken you into their areas.
Many vaults do not have to be completed in this exact order. Some, however, can be tied to wider progression or access to later regions. This page focuses on the shard sources inside them rather than the quests or regional unlocks needed to reach every entrance.
Vault Shard monster drops
Four guardians have the following listed shard quantities and drop rates. Each enemy has two listed shard outcomes. These figures are drop chances, not promises that every kill produces at least two shards.
| Vault enemy | Shard quantity | Listed chance |
|---|---|---|
| Vault Archon | 2 | 25% |
| Vault Archon | 3 | 15% |
| Vault Guardian Hulk | 2 | 25% |
| Vault Guardian Hulk | 3 | 15% |
| Vault Guardian Sentinel | 6 | 25% |
| Vault Guardian Sentinel | 9 | 15% |
| Vault Overlord | 6 | 25% |
| Vault Overlord | 9 | 15% |
Vault Guardian Sentinels and Vault Overlords have the largest documented shard quantities among these four enemies. Archons and Hulks have the same listed chances but smaller quantities. This makes the enemy type relevant when deciding whether a difficult fight is worth taking, though a faster clear of an easier vault can still be more practical for an under-equipped character.
Other vault enemies are also identified as potential sources, including the Vault Incinerator, Vault Pyroclast, Vault Corruptor, and Vault Striker. Do not assume that these enemies provide the same quantities or rates as the four guardians above.
Ordinary vault inhabitants should not be treated as guaranteed shard sources. Vaults can also contain rats, goblins, skeletons, and other regional enemies. The reliable rule is to target the actual vault monsters and guardians while continuing to check every chest.
Vault Shard chest drops
Vault chests provide a second chance at shards. The named chest entries all list a quantity of 4–6 shards, but the chance varies by vault.
| Chest location | Shard quantity | Listed chance |
|---|---|---|
| Crasorak Kara | 4–6 | 10% |
| Thishepen Kara | 4–6 | 10% |
| Vertentis Kara | 4–6 | 10% |
| Takla Kara | 4–6 | 4% |
| Skeklac Kara | 4–6 | 4% |
| Kletterbuja Kara | 4–6 | 4% |
These rates explain why a complete chest sweep can sometimes produce nothing. A chest without shards is not evidence that the vault cannot contain them. The first three vaults in the table have the better documented chest chance, but the table alone does not prove that any one of them has the best total yield per run. Total farming value also depends on the monsters present and how quickly you can reach all the loot.
Miscellaneous Salvage has an additional listed outcome of 3–9 shards at 5.26%. Treat that as a bonus rather than the foundation of a route.
A practical Vault Shard farming loop
Use this loop when you need shards for a specific craft rather than simply hoping they accumulate during exploration.
- Set a shard target before leaving. Check the complete recipe and count every shard-consuming component, not just the final assembly. A weapon that shows eight shards at the last station may also require precursor parts that consume additional shards.
- Choose a manageable vault. A fast, complete clear is more useful than entering a high-power vault whose guardians repeatedly defeat you. Crasorak Kara, Thishepen Kara, and Vertentis Kara are the documented power level 2 starting options.
- Make space for the loot. Vault Shards weigh 5.0 each. Empty excess materials and equipment before the run so a successful drop does not force you to abandon other objectives.
- Defeat the actual vault guardians. Prioritize Sentinels and Overlords when they are present and safely within your combat capability because their documented shard quantities are higher. Do not assume any individual guardian must drop shards.
- Open every accessible chest. Chests are a separate source and can produce 4–6 shards in the named vaults. Search side rooms and opened passages instead of leaving immediately after the principal fight.
- Collect Vault Cores separately. Cores are normally found by interacting with pillars near progression points. They are not a substitute for shards and should not be counted toward your shard target.
- Move to another discovered vault after the clear. If a revisited vault is still empty, rotate to another discovered location and return later.
- Deposit the haul before the next long run. Shards stack to 99, but their weight makes repeated clears increasingly expensive if you carry the whole stockpile with you.
Do not mine Rune Essence expecting it to turn into Vault Shards. The two materials can appear during the same broader vault trip, but Rune Essence is not listed as a shard source.
Plan your shard budget before crafting
Vault Shards appear in a large number of recipes, so spending every early drop on the first available item can block a more important upgrade. Decide whether your immediate bottleneck is armour, a weapon, a station, or a progression shield.
Early equipment costs
Many iron weapons require 4 Vault Shards each, including the Iron Dagger, Iron Greataxe, Iron Greatsword, Iron Mace, Iron Sword, and Iron Warhammer. The Iron Shield also requires 4.
A standard iron armour set uses:
- Iron Helmet or Iron Med Helm: 1 shard
- Iron Platebody: 3 shards
- Iron Platelegs: 2 shards
That is 6 shards for the three armour pieces, or 10 shards when paired with one four-shard iron weapon. Shields, spare weapons, jewellery, and stations increase that budget, so reserve your next essential upgrade before spending a surplus.
Several other three-piece sets follow the same six-shard total:
| Armour set | Head | Body | Legs | Total shards |
|---|---|---|---|---|
| Dark Mage | 1 | 3 | 2 | 6 |
| Studded Leather | 1 | 3 | 2 | 6 |
These totals cover only the Vault Shards. Every recipe also has its own bars, leather, cloth, wood, gems, or other materials.
Larger one-off costs
Some important crafts consume a much larger share of the stockpile:
| Craft | Vault Shards | Additional key requirement |
|---|---|---|
| Furnace | 8 | Stone, Clay, Charcoal, and Fire Runes |
| Anti-Dragon Shield | 8 | Includes 1 Vault Core plus other materials |
| Crystal Bow | 8 | Includes 1 Vault Core plus other materials |
| Staff of Light | 12 | Includes 1 Vault Core plus other materials |
| Granite Maul final assembly | 8 | Requires three crafted precursor components and 1 Vault Core |
The Granite Maul deserves special attention: its final recipe lists eight shards, but the Imbued Granite Maul Head, Ornate Maul Handle, and Imbued Leather Wrappings consume additional shards when crafted. Count the entire component chain before deciding that eight is enough.
Jewellery can also drain a reserve through repeated small purchases. Many inspiring rings require 3 shards, while several amulets require 6. Crafting one accessory looks inexpensive; equipping a full cooperative group can turn it into another major farming target.
Vault Shards, Vault Cores, and Ascension Shards
The similar names describe three different resources and three different acquisition paths.
| Resource | Acquisition | Crafting role |
|---|---|---|
| Vault Shard | Vault monsters and vault chests | Weapons, armour, stations, and other recipes |
| Vault Core | Usually collected from pillars near key vault progression points; three are typically present in a vault | A separate ingredient required by some advanced recipes |
| Ascension Shard | Separate progression material associated with upgrading Masterwork equipment | Masterwork equipment upgrades |
When a recipe needs both shards and a core, collect them independently. Killing a guardian can supply Vault Shards, but it does not replace the pillar interaction used for a Vault Core. Likewise, advice about farming bosses, dragons, or Nightmare Crucibles for Ascension materials should not be applied to Vault Shards.
Common Vault Shard blockers
A guardian dropped no shards
That is consistent with the documented rates. Even the four guardians with known data have chance-based outcomes. Continue clearing other guardians and chests rather than assuming the item is bugged or guaranteed.
A chest contained no shards
The named vault chests list either a 10% or 4% chance. Most individual chest openings therefore will not produce shards. Search every available chest across multiple vaults instead of depending on one container.
A cleared vault is still empty
Rotate among discovered vaults and revisit later. A cleared location cannot supply another full run while its enemies and chests remain empty; choose an active destination instead of repeatedly checking the same rooms.
A group runs out after one crafting session
Budget per player before anyone spends the shared stockpile. A basic three-piece iron set plus one four-shard iron weapon costs 10 shards per person. Shields, stations, jewellery, and advanced crafts are extra.
The inventory becomes too heavy
Each shard weighs 5.0 even though up to 99 can occupy one stack. Deposit previous runs at the base and avoid carrying the entire reserve back into the next vault.
See vault marker navigation for the requirements and steps of that next task.
See the separate Ascension Core system for the requirements and steps of that next task.