

Black Knight's Fortress takes you into Dowdun Reach after Withering Heights. Speak to Death in the Forgotten Temple, meet Cathan south of Silverthorn Keep, then restore the Dreaming Stone with 13 shards, defeat the Black Knight Titan, and return to the stone for your rewards and the next stage toward the Umbral Sands.
Most of this quest is a fortress-wide collection route with puzzles, digging, mining and NPC trades. Killing the Titan without completing and turning in the quest objectives is not the whole walkthrough.
Bring the tools for all 13 shards
The community Wiki quest entry lists Withering Heights as the prerequisite. For the route below, prepare:
| Item or ability | Why you need it |
|---|---|
| Steel or Undead Spade | Dig up the grave shard, Valerius's memory chest and the buried Menagerie lever |
| Mithril Pickaxe | Break the glowing rocks beside the dragon for a shard |
| Mithril Logging Axe | Clear vines around a lever and a shard; burning the vines is an alternative in the route |
| Fishing Rod | Catch the fish requested by the underground goblin; use the best rod available to you |
| 5 Maple Sap | Give the unprocessed sap to Spittletoe for a shard |
| Windstep | Reach the elevated beams and gaps used by this route |
Keep the five Maple Sap uncooked for Spittletoe's trade. The current Wiki quest overview lists five sap, and the hand-in is shown in this complete quest walkthrough and this Dowdun Reach route. Cooking it into syrup would turn it into a different item.
Bring good food, potions, armour and weapons for the fortress fights. A base camp in the Courtyard is useful for preparation, but building one is not a fourteenth shard objective.
Enter Dowdun Reach and inspect the Dreaming Stone
- Speak to Death in the Forgotten Temple after Withering Heights.
- Find Cathan east of Fellhollow, near the ominous gatehouse south of Silverthorn Keep.
- Enter the open gateway and go through the ominous door to start the region's introductory scene.
- Travel south through The Approach to The Courtyard and speak to the Wise Old Man.
- Follow the uphill route into The Nexus, speak to Doric, then inspect the Dreaming Stone beside him.
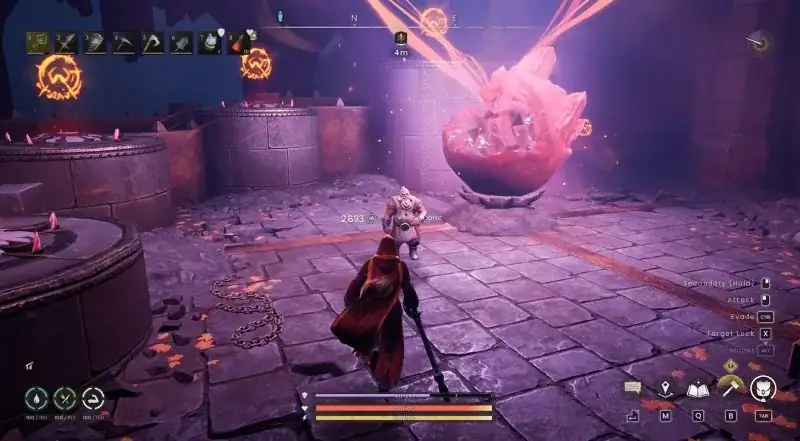
The stone authorizes access to the Nexus nodes and marks the missing shards with yellow map circles. You need 13 in total. Three are underground; the rest are above ground.
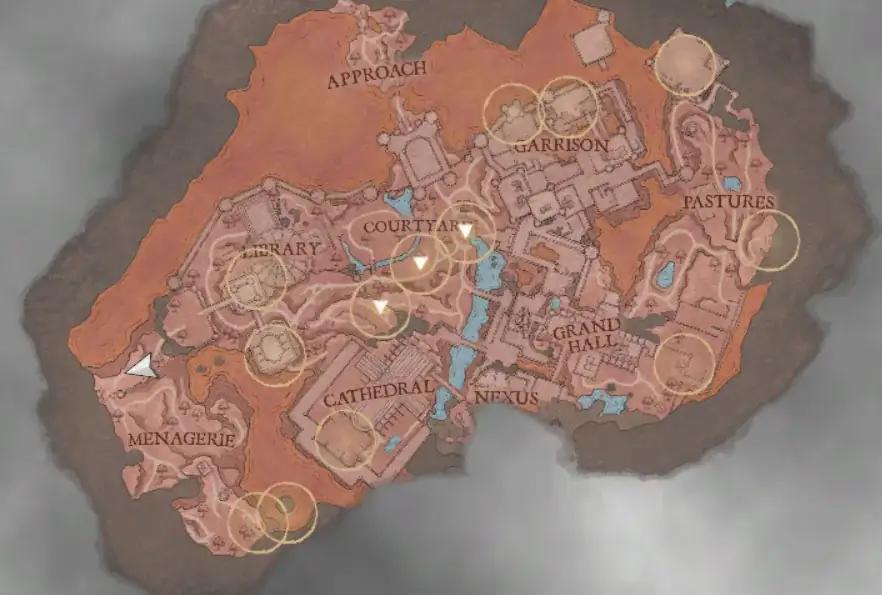
The numbers below are a collection order for following this guide, rather than labels that the game assigns to the shards.
The detailed directions follow MetaForge's fortress route. Activate Nodestones as you reach them and open gates from inside where possible to make return trips easier.
Shards 1–2: Garrison towers and Sergeant Blister
Start near the Wise Old Man and follow the hill to the left toward the Garrison. If the main gate is still locked, the route uses Windstep up the rocks beside it. Continue toward the barrels and barrier, cross to the other side and climb toward the suspended beam above the cage.
Clear the two Acolytes on the outer platform. From there, either Windstep toward the bridge or go through the building and use the stairs. Continue across the upper platforms into the tower for the first shard. An elite enemy guards this area; clear it or take the shard while safely avoiding its attacks.
For the second shard, descend via the opposite tower roof, clear the snipers and work down to the bridge. Go outside, turn right and drop toward the bridge with fire traps. Sergeant Blister and Hellrats occupy this area. Defeat Blister to remove the red barrier around the shard, then collect it.
Shards 3–4: Pastures rocks and the small building
Cross back over the bridge and take the right-hand route through the archway. Climb the stairs, time the flaming section and use Windstep across the gap beyond it. Clear the goblins on the far side and deal with Hellhounds before climbing the rocks on the left.
Follow the uphill path to the dragon. The third shard is inside the pile of rocks emitting light. Strike that pile with your Mithril Pickaxe and collect the shard. You can fight the dragon, or create an opening by baiting and dodging an attack before mining; killing it is not the shard's mining interaction.
After leaving the dragon area, follow the nearby cliff route and Windstep up the ledge. Clear or avoid the enemies ahead and enter the small building to collect the fourth shard.
Shard 5: Spittletoe's five Maple Sap trade
Drop from the Pastures ledge and pass under the rock bridge. Unblock the Nodestone here for the return journey, then climb the stairs into the building on the right. Clear the Hellrats and follow the bend to Spittletoe in the kitchen by the Grand Hall.
Bring him 5 Maple Sap, hand over the sap when prompted and collect the shard. The walkthrough linked above shows him also giving the Maple Toastie recipe after the exchange. Chop Maple Trees with your Mithril Logging Axe to obtain sap if you arrived without it.
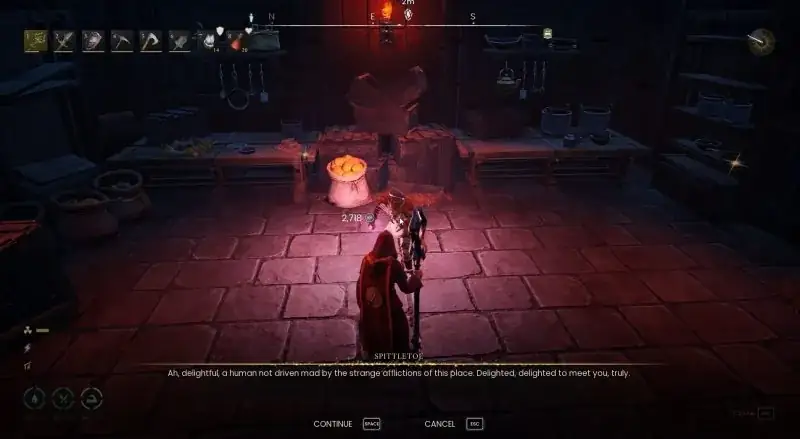
Some earlier guides route this part through Snotpit, the Chef's Journal password “Please” and a cooked Maple Toastie. The direct sap hand-in is the route supported here by the current quest material list and multiple walkthroughs. Check Spittletoe's active request in your journal before preparing food; you do not need to follow the older recipe hunt to make the five-sap delivery.
Shards 6–8: The underground route
These three shards are below the fortress. Return toward the Wise Old Man and the Cathedral entrance. If the gate is locked, the route uses the rock on its left to Windstep over, then opens the gate from inside for future access.
Dig beside the body for shard 6
Descend the stairs below the Cathedral. Clear the patrolling Zogre and approach the dead body slumped against a tombstone; zombies appear as you get close. Read the nearby note, then use your spade on the grave beside the body to retrieve the shard.
Other graves can contain enemies or loot. Digging them all is optional and is not necessary to obtain this shard.
Catch the goblin's fish for shard 7
Turn around from the tombstone and take the stairs on the right farther down. Avoid the traps at the bottom, pass through the skeleton room on its left side and descend the next flight.
Clear the room containing a mage, demon and Acolyte. Go through the large hole in the wall, activate the Nodestone and find the fishing goblin. Use your fishing rod at his fishing spot to catch an Unusual Trout, then hand it over for the seventh shard.
Use the lift and clear the demons for shard 8
Return to the mage room and take the stairs down to the lift. Pull its lever, ride to the bottom and activate the next Nodestone. Follow the path toward the bridge, dealing with the explosive plants from a distance and clearing the Hellrats.
Cross the bridge to the central area. Two demons appear when you approach. Defeat them to remove the barrier and collect the eighth shard.
Shard 9: The Library book puzzle
From the Courtyard, start near the tent beside Vannaka, to the right of the Wise Old Man. Climb the stairs into the Library and clear the enemies before working on the puzzle.
Interact with the book beside the orange barrier, shown as Alric's Notes in the interface and called Alric's Journal in the written route. Then read these four books in order:
| Order | Book | Where to look |
|---|---|---|
| 1 | The Empty Throne | Left side of the Library room |
| 2 | The Eye of Oculus | Middle aisle on the left |
| 3 | Taking the Crown | Diagonally across from the second book |
| 4 | Zamorak's Rebellion | Back near the barrier and Alric's Notes, on the upper shelf behind you when facing the barrier |
The named sequence walkthrough and another fortress guide give this order. A correct selection produces a “mechanism clicks” message. If you choose a wrong book and the sequence resets, start again from The Empty Throne.
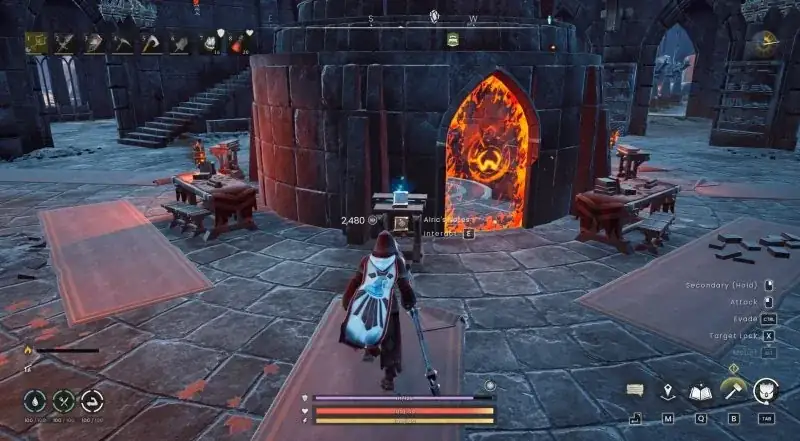
This removes the barrier leading downstairs. Clear the demons and Hellrats below, then take the ninth shard. A Magical Focus consumable may help with the combat, but is preparation advice rather than a puzzle key.
Shard 10: Valerius's Glittering Memory
Leave the Library, turn left and use the outside stairs. Watch for the fire traps on the second flight. Cross the bridge, defeat the two Black Knights and speak to Valerius inside. He wants his Glittering Memory in exchange for the shard.
Go back over the bridge and climb the third flight of stairs. You can fight or avoid the dragon along this route. Continue to the Nodestone, then return toward the dragon and drop down the nearby hill. Use your spade to dig up the chest containing the memory.
Bring the Glittering Memory back to Valerius to receive the tenth shard. Defeating the dragon is not a substitute for delivering his requested item.
Shards 11–12: Menagerie levers and high beams
Light the three torches for shard 11
Start at the Nodestone beyond the dragon on the Valerius route. Go through the broken wall, turn right up the hill near the large stone rise and continue past the zombies. Clear the dragon occupying the next area, then find the small building with a locked door.
Pull the three levers that light its torches:
| Lever | How to reach it |
|---|---|
| Beside the locked door | Chop or burn the vines blocking access |
| On the roof of the house to the left | Windstep onto the roof and dig up the lever with your spade |
| Upper floor of the ruined building at the back | Windstep up to reach it |
With all three torches lit, enter the opened building and take the eleventh shard.
Climb the beams for shard 12
Return to the same Nodestone and pass through the hole again. Follow the route straight ahead; dropping down the ledge on the left avoids one group of enemies. Continue toward the Hellhounds and clear them before crossing the narrow beams.
Cross the first beam to its wooden platform, then use Windstep to climb the higher beams and reach the far ledge. Cross the final gap to collect the twelfth shard. The chest along this route is optional; it is not the shard objective.
Shard 13: The Cathedral courtyard vines
Return to the Courtyard near the Wise Old Man, go through the open gate and climb the hill to the left. Windstep onto the lower ledge toward the Cathedral, then use its side archway rather than the front approach. Clear the two skeletons outside and the patrolling Acolyte inside.
Go right through the Cathedral toward the open area and stairs. Descend while keeping to the left wall. The shard is in the courtyard behind vines. Clear the vines by chopping or burning them, then pick it up.
Repair the stone, defeat the Titan and claim the reward
Return all 13 shards to the Dreaming Stone. During the conversation it reveals itself as Avisk and threatens you. Choose the first response about destroying it to continue the exchange and lower the barrier.
Enter The Bastion through the opened barrier. Climb the stairs, using Windstep for the gaps, and activate the Nodestone near the top before approaching the Titan's barrier. Prepare food and potions before entering the fight. Jagex removed Wardstones before the 1.0 release, so older directions to refill them do not apply to the current health system.
Defeat the Black Knight Titan, then return to the Dreaming Stone and finish the conversation. Open the Black Knight’s Fortress reward pack in your inventory after the conversation. The Wiki reward list records:
- Titan's Wrath, the two-handed sword.
- The Titan's Wrath crafting recipe.
- A Tome of the Titan, awarding 750 XP each to Magic, Ranged and Attack.
The stone discusses reopening the route toward the Umbral Sands. Finish this conversation and follow your updated main quest rather than assuming the boss's death alone completed every step.
If the Bastion barrier will not let you through after repairing the stone, check the other Nodestones: the community Wiki notes that unblocking the region's nodes can affect access, with the Bastion node itself excepted. If your journal still lists the boss after victory, speak to the stone and Doric and verify your current objective before repeating the entire shard hunt. Older multiplayer bug reports do not establish a guaranteed current fix.